
Activating Windows 11 using a license key is a straightforward process. Here’s a step-by-step guide on how to do it:
1. Get a cheap Windows 11 License Key here:
2. Open Settings:
– Click on the Start button (Windows icon) in the taskbar.
– Select the gear icon to open the Settings menu.
3. Navigate to Activation:
– In the Settings menu, click on “System” and then select “Activation” from the left sidebar.
4. Enter the License Key:
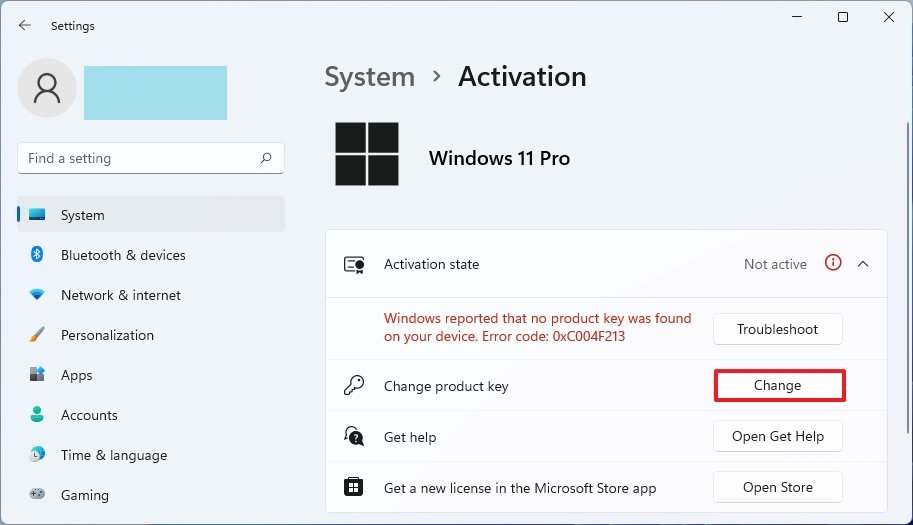
– Scroll down to the “Windows” section, and you should see an option to change the product key.
– Click on “Change product key” and enter the 25-character license key.
5. In Next step Activate Windows:

– After entering the license key, click on the “Next” button.
– Windows will connect to Microsoft servers to verify the key. If the key is valid, your copy of Windows 11 will be activated.
6. Then restart your Computer:
– In some cases, you may be prompted to restart your computer for the changes to take effect.
7. Check Activation Status:
– Finally, to confirm that Windows is activated, go back to the Activation section in Settings. It should now say “Windows is activated with a digital license.”
Lastly, remember that it’s important to use a valid and genuine license key to comply with Microsoft’s terms of service. Avoid using unauthorized or pirated keys, as this is a violation of Microsoft’s policies and can lead to legal and security issues.
(Elite Keys PRO)


Leave a comment
Your email address will not be published. Required fields are marked *